Rainshadow REVOLUTION 9010-4 — The test

The finish of my REV 9010-4 had barely cured when a freight train of work hit me. A week later, I packed it without having tested it… My first stop in the road to Ireland was in Beauvais. It’s a rather uninteresting small town, but you’ll find there (a) cheap planes for Shannon ; (b) Ed. Ed is my dear friend, and the closest thing I know to a perfect fishing buddy. Simple, fun, kind, very competent with a rod, at ease with beers and whiskies… Paying him a visit is always a joy for me. He knows my obsession with casting and is more than willing to oblige. So the night I got to his place, we hit the lawn for a first test.

the lawn

Ed, going for the backing

Ed, going for the backing

We were testing the REV 9010 paired with two combos: a Sage 2210 with a RIO Depthfinder 400 gr.; my old’n trusty Okuma Airframe 7/9 with an older 9wt Aircell Supreme which will simply not die. I love this last one, it flies like a champ. I like to underline a rod, I think it’s a good test on its ability to convey information.

On the lawn, things are easy. There’s no trees to bother you, you don’t have a friend just where the line is supposed to fly, the ground is not moving with the waves or with said friend casting frenzy. No snags for the line lying on the ground. And even if my casting fly for such rods has some bulk, it’s nothing compared to a pike streamer. I take out 20m of the Depthfinder,

50m of backing is plenty for pike, but the reel could take 300m more

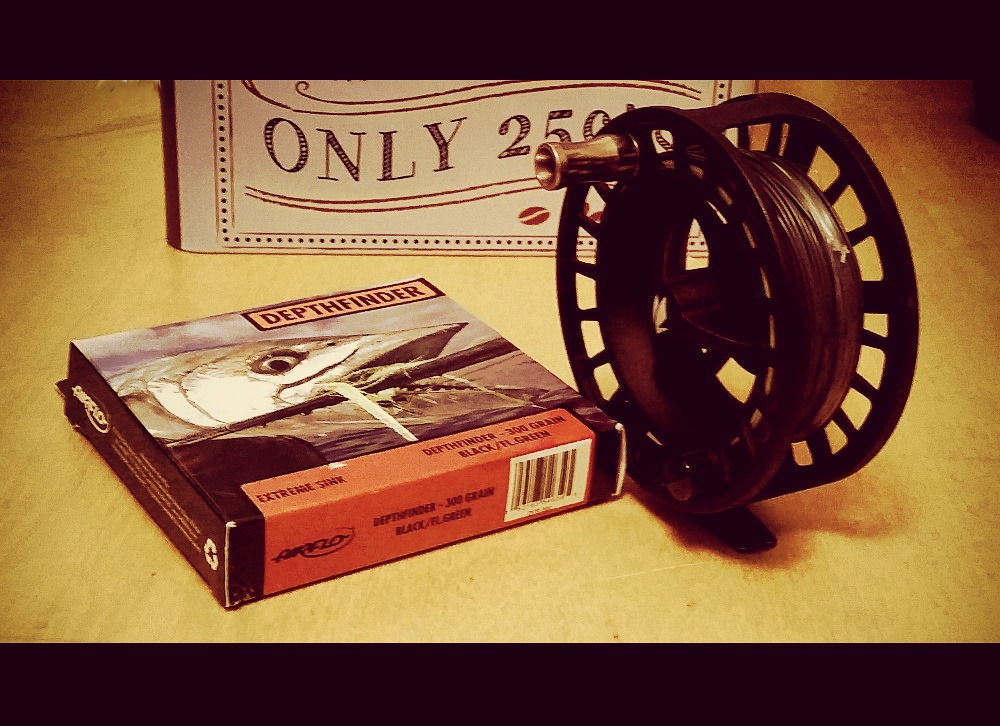
50m of backing is plenty for pike, but the reel could take 300m more. Easy.

make a false cast to take the head out of the tip guide, shoot… dang. That’s the sound of the line straighteneing out. Massively overpowered, the line’s end lands at a familiar left hand 90° angle. Well, I think. This is going to be fun. I take the whole line out, with a good meter or so of orange backing hanging out of the reel and I proceed to go berzerk. Second cast, there’s easily ten meters of running line out of the tip when I try to shoot. I land a pile of crap in front of me… Damn sinking heads!

Then I remember Marc-sensei severe frown. I take back most of the line, and focus on proper loop shape at 12m. The rod reacts rather well at short distance, despite the fact I’m basically casting lead core. Not pleasant, but it remembers me the mechanics of fly casting, and the motto:

l e s s  p o w e r !

And watch your backcast.

And watch your backcast.

A dozen of short casts later, I’m back to distance. Take the head out. But not to much. Smooth application of power. Get speed, but no jerk. First try, most of the line is out. Second try, remember to reach far back for the frontcast haul. Zwooof-tak! Backing. I feel a rush of stupid teenager thrill&pride…

Many casts later Ed and I are getting the backing out of the tip guide. What I like most? Very low tip bounce. The loop zooms out without ugly rod-leg waves. I’m thinking: this is gonna work well on the pikes.

The rod is heavy (it’s a 10wt), and so is the line. Those ultra fast sinking things are not made for anything delicate. But with a nice, controlled double haul, you will reach out to that border over there with little fatigue. A side note: the Sage 2210 I’m using with the rod is just perfect for the job: the rod balances just shy of the grip’s end, the drag is great (doesn’t matter much for pike, but could come handy the hypothetic day I’ll find myself on the flats chasing tarpons).

let’s fish

The guns, and our blood. Pike do have many teeth.

The guns, and our blood. Pike do have many teeth.

A short week on the lakes around Corofin, Co Clare, Ireland, taught me what I didn’t know already about the REV 9010-4. Let’s break it down in three points:

  1. the rod is a casting machine. It really works well. And I’m talking about huge streamers in strong head winds. Ireland did its thing on us: gales, hail, pouring rain, bright sun, soft grays, we had it all. There’s more power than you need in the blank’s butt to punch a super heavy line and half a chicken through aggressive guts of wind. And as far as I can judge it, it will make things easy for you: it’s not the kind of rod that require concentration to operate it properly.

    Big. Streamers. This guy is 10".

    Big. Streamers. This guy is 10″.

  2. the rod fights well. I caught 10 pikes on the REV 9010-4 during this trip. Modest count, but enough to draw some conclusions. With 1.20 m of 80% fluoro as a leader, I did not bother with finesse. Strike. Lock the line. Let the rod work. It’s a very fun way to fight. I guess a really big fish would have forced me to use the reel, but we’ve had no luck with that. Anyway: superb rod behaviour under heavy load.

    You're going nowhere, my lad.

    You’re going nowhere, my lad.

  3. the rod is not tiring. of course it’s heavy, but is it heavy for a 10wt? A Sage Musky is 145g, this one is 172g. But the grip design (very big fighting butt and relatively heavy seat) and the huge stripers accounts for most of the difference. It feels a tad heavier in swing weight than the super champs of the category. But just a tad. You can wave it all day during several day. I did it. It will leave your arm sore after 10 hours, but I’m yet to see a rod that won’t. It’s not sight fishing, with all the wait and rest. It’s fishing the borders, cast after cast after cast, all day long. And if you’re not fit and well warmed up (I’m neither) you’ll pay. But I really cannot imagine much harder work with a flyrod, and this rod impressed me. The last day, I still was eager to grab it.

All in all, the REV is one damn fine blank. A pleasure to build, even better to cast and fish. The price is good, and if you’re in the States, for little more than $200 you’ll have a truly excellent 10wt. It will not fear a twenty pounder pike, I don’t think it would lack power for the flats or reasonable glanis (up to 170cm or so).

inchiquinn

Having fun in Irish hell with the REV 9010

Proof of the pudding.

Proof of the pudding.

Rainshadow REVOLUTION 9010-4 — The build

Long time no see, I guess. It’s good to be back.

So, I got the opportunity to lay my hands on a kit to build a Batson/Rainshadow rod for pike on the fly. That was a month ago, with just the perfect timing: ten days later, I was going to Ireland with Simon to explore the waters around Corofin, Co Clare, which I understand are haunted by some fat boys.

Me, holding the yard-long pike I totally failed to catch

Me, holding the yard-long pike I totally failed to catch (Dromore lake, Co Clare, Ireland).

Writing on Le Mouching with Jérôme Servonnat, I’ve learned a lot about pike on the fly. And in particular that fast rods are not what you want to wave around when there’s a foot-long streamer on the business end of the line. You need power in the butt because you’re going to shoot a lot of line, but you need a smooth delivery, or you’re going to wreck your arm after a day of fishing. Another valuable point is the grip configuration. It’s a good idea to have it long, so the fighting butt rests low on the forearm. It helps to get power on the backcast, and gives you stability when you fight the fish.

the build

11146150_506870432815402_1700781153_n

Nice walls.

When the kit got home, the first thing I noticed about the blank was its wall thickness. There’s a lot of carbon in there. My guess is that the Batson guys are primarily salmon fishermen, and that thing is designed to deal with serious chinooks. Just from gut feeling and a little wiggle test, I thought there’s no way a pike will push this stick to its limits. Which is cool: you fish with confidence, and fight them hard. And that makes the fight much more fun.

11139453_506870312815414_34830413_n

What the scales says

The blank I received was quite straight, with a beautiful silky finish that’s pleasing to the eye and to the touch. It is on the heavy side, but then it’s designed for big fish. Batson advertise it at 71g (2.5 oz) and that’s exactly what my scales says. The wiggle test suggests lots of power and not much rebound (excellent!). I cannot wait to cast it.

For the layout, I went for single foot guides in sizes 4 4 4 4 5 5 6. I just don’t see the point of snakes. Then (concession to the Batson style) three insert guides (Alps XBMXNLG) in size 12 16 20. I think it’s huge, but I reasoned that maybe the guys at Batson’s know their jobs and it really works better. At any rate, given the kind of power in the lower half of the blank, a couple of extra grams won’t make much of a difference. And since I’ll be flying a Depthfinder Big Game 400gr I probably won’t notice much in action.

poignéeReel seat and cork grips are Alps products, and so is the fighting butt. This guy was too short for my taste, so I cut it in half, turned a cork ring to size, and glued back the butt with this extra cork in the middle.the result is a grip that works like intended. It looks a little like a switch rod, and I promised myself to try it with double handed speys sometimes.

The building process went without problem, except for the goddamn sticker. Stickers hate us. They secretly plot against our sanity. The thing is: you don’t want to touch the glue side, and you dont want to reposition the thing because of major risks of borders lifting while the finish is curing. Which translates as: almost without touching it, land that bastard straight at first shot. In plain English: a miracle. That’s why Batson generously gives you two of those, so you can totally screw up the first and have a chance to learn with the second. As I’m particularly gifted in such exercices, I think I could easily wreck ten of those before getting one right. So, after a first try and spectacular fail, I got the second and last to land flat, but askew, then decided that askew is the new straight and left it like that.

Who cares about straight?

Who cares about straight?

I went for an unassuming black on black look, bastard child of my less-is-more taste and the lack of time before my Ireland trip. But mainly, because it looks good. Wrapping a black thread on a black blank tends to be taxing on the eyes, and I would have suffered a lot if I hadn’t made the single best investment in my rodbuilding life: a big magnifying glass with lights on it. With this thing on my desk, I’m seeing things as never before. Are you half blind? Do you ever feel you’re goggling so hard at your wrap your eyeballs are about to pop out from your skull? Get the glass. You won’t be sorry.

from the desk of g0nefishin9

from the desk of g0nefishin9

black on black

black on black

A note about the reel seat. My kit included a RA801L2TR-B from Alps. The looks of the RA801 is less plain than the former RA8, which I deplore. I loved the extreme simplicity of the old design. Nevertheless, this one is clearly very good. Double nut, as it should, holds steadily any reel foot I tried on it (Sage 2210, Okuma Airframe, Loop Opti Speedrunner).

Stay tuned: next time, casting and fishing results.


measures (for the rod)

weight = 174g (6.14 oz)
weight (grip) = 122g (4.3 oz)
AA = 63°
IP = 2963 gr.
ERN = 9,55

AA=63°

AA=63°, mod-fast, in a good sense.

Summer feasts

I’ve spent a couple of days last week in Cyril’s beautiful house in Montrozier, in Rouergue, one of the very beautiful parts of “this best garden of the world, our fertile France“.

Cyril, of Mouching global fame, was to get married there on the 21th, in that rather impromptu fashion that he seems to like well, and I definitely love in most compartments of my life. Much had to be organized for the party to be a proper wedding, I had a blast transforming a centuries old barn into a banquet room, while meeting many great people and eating tons of meat and tons of cheese. I even had a couple of opportunities to get the Babe out of her sock and have a go at the Aveyron river’s chubs, just under the medieval bridge. They were willing to take a sz 14 ant.

montrozier1The party was a blast indeed. I wish Elizabeth and Cyril every bit of the good fortune they deserve. I love you both, you beaming crazy guys.

20140821_181302_resized


[Casting log] Kids as trouts

A long ago I wrote about a casting game I played with the kids. They loved it so much that they took advantage of my taking up some serious lawn training to ask for more. But they are two years older, so they wanted it a little more interesting, so they invented new rules. Here’s for you a great way to mix your casting routine with your parental duties.

lego15


Take your gnomes out for a picnic somewhere you can cast. Many city parks offer good options. It works best if you’ve got more than two littluns. I’ve got three, I think four would do also, more would probably result in chaos, which may also be good. Rig your favourite casting rod with something flashy and big on the business end of the line. Your goal is to catch the kids by touching them with the fly. When you touch a kid, (s)he should freeze. The other ones may free the prisonners by crawling between their legs and tapping once on their head. (Weird, I know, but they came up with that and it seemed to make plenty of sense to them, and judging by the bursts of laughter, they probably know what they’re doing). You score a point each time you manage to freeze all the kids. You’ll work accuracy on moving targets, line management, and speed, which makes it the perfect drill before a trip to the salt. It’s huge fun, and I think you should try it.

I’m off to Sarzeau, on the Golfe du Morbihan, for a Rodhouse seminar, basically a gathering of terminal-stage tackle geeks for 48h of silly talk, misdemeanor, putting livers to the test, fiddling with as much rods as possible, and possibly catching some good seabass in the process.

sarzeau2

I reckon there won’t be much happening, flywise… Let’s hope that two days of spinnning will not ruin my fly karma.

[Casting Log] PULD & wind.

Back on the lawn yesterday, there’s a lot going on castingwise these days, so I decided to start a casting log, if only to keep actual track of what I’m doing.

I’ll probably never really get past this distance mental illness that compells me, when I’ve got a fly rod in my hand, to try and see how far I can punch the line. I may resist, but sooner or later I’ll be zinging all out. Still, I’ve made some progress: in a 60mn session, I kept the madness well under 10′, which left me plenty of time for doing actual training.

I was back to basics, and doing Pick Up and Lay Downs, focussing on loop shape, accuracy, and changing directions. I was inspired to learn the PULD again by that great piece of teaching (and loosy piece of filming (man, get a tripod!)) by Peter Hayes:


What made things interesting was constant guts of wind, as I was using a 4wt. I like to train with a light line in the wind, because the wind is an unforgiving sonnovabitch. If you don’t get a good loop at good speed, your cast goes poopshaped. And not in a good way.

It’s also good for staying focussed on trajectory. Marc once said to me that every training cast should have a target, and daisies patches make for great rises. Aiming in the wind is a good drill, and most certainly something very useful when you fish. If you’ve got some space around you, just turning around to change the wind’s direction will put you in a whole new setting and keep things interesting. You’ll have to do backhand PULDs for instance.

After an hour or so, the kids came in and they had invented a new casting game which was great fun. More on that later.

Rudd test, the roll and the tail

Tuesday I got to see some water with actual fishs in it. It was cloudy, and rather windy with pretty decent gusts around 40kph. There were lots and lots of stuff growing on the banks of the pond, so the practical thing to do would have been to bring the 6wt.

But I’m not a practical man.

As you know, I’ve just built a tadpole. ‘So’, I thought, ‘today will be the day where it will become a proper rod’. Which means: where it will start to smell like fish. Casting a 5’10” 3wt glass rod among the bushes in the wind made up  for an interesting training session. It turns out it wasn’t as bad as I thought (even if sometimes it was just impossible to cope with the conditions, I had to resort to the old “light a smoke and let go” trick.) I lost flies to bushes, I tangled line, I filled a boot with water, but man, I fished, and I fished glass.

rotengle

And I caught a handful of those lil’ guys, which I love because they are really into surface feeding and they won’t give you more than the blink of an eye before spitting the fly, so you need to put your nerves on overdrive.

But let’s talk casting now, I’ll go back to the tadpole in a later post.

I realized something interesting, castingwise. In the whole session, I tailed exactly once. As you may know, I had a serious tailing loops habit, and I really struggled to understand where it came from. And now the tails were gone (or at least quite fewer), and that was a bit of a surprise. Especially because last year I did not train that much. So I wondered where the progress came from. And what I found is refreshingly odd: indoors roll casting. You see, the only serious training I did with a rod since a long time was roll casting in my flat with the MPR. I suck at roll casting, and it’s not an option, so I concentrated on it (plus, you’re less prone to domestic disasters when roll casting at hoome than when you cast overhead, unless you’ve got a really big home.) Anyway, a couple thousand casts later, I have made some progress on this front. Apart from what I could call (probably inadequately, but Marc will hopefully correct me) anchor management, my problem with roll cast was power application. So I concentrated on late rotation and smooth acceleration.

The problem when you carry line in the air is that all the components of the cast must be dealt with more or less simultaneously: timing, power, casting arc, stop, etc…. You can simplify things with the PULD, but it’s with the roll cast that you can really focus on power application. Especially indoors, since you don’t have to deal with current. So, here’s my casting tip of the day: roll casting is good for tails. And here’s some fantastic footage with Carl McNeil explaining the roll, how to do it and why it’s important.

Tadpole (2): Cut&Pasting blanks

This post will deal with two things I experimented on the tadpole: blank extension and spigot ferrule creation.

tadpole

So, you’ve heard everywhere about fiberglass, which is the next craze in our little fly world. Maybe you’re just a tackle freak, and you want to check it out because you’ve got to. Maybe you’re tired of putting a 7wt TT on your fast 5wt to ba able to use it (but you like fast, of course, who wants to like slow?) and you wonder if the ‘true glass feel’ will not give you a good story to tell to go back to something that matches your actual casting stroke. Maybe you just want to get a really short fly rod. Or you can’t afford much more, and you suspect you could get a nice rod for very little money.
Any of these reasons is valid, but the best ones to go the tadpole route are the need for a short rod that will tke some abuse, and the lack of funds. At 5′ and 13€ apiece, provided you’re not too fancy about the rest of the components, your ticket for the short glass world will not break the bank. Obviously, there’s very good opportunities on the second-hand market, but building your own rod is something else, and as the glass bug spreads prices tend to get a little out of hand.

fenwick

Classic glass. Will cost you an eye.

So. You’ve got a handful of coins and want to have fun with the ten inches chubs in the stream back there, without fearing to have a go at those fat three pounders you see sometimes. Let’s say you’d prefer it not too short (closer to 6′) and in two pieces for transport.
Come here, I’ll show you how you do that.

First get two Batson SPG 601 blanks. You’ll need the second as an organ donor. A couple of inexpensive burl cork rings (10 is good), a simple aluminium reel seat, six fly guides (five #1, a #2), a garden variety size 12 insert guide for the stripper, a 4.5 tip and you’re set. If you insist you can add a winding check and a hook keeper. I did not.

Stickers you probably won't use on a tadpole

Stickers you probably won’t use on a tadpole

Now, follow those steps:

  1. Sand gently blank #1 to remove the paint.
  2. Find and mark the spine on blank #2. Measure its inner diameter (ID) at the butt.
  3. Find the point on blank #1 with a matching outer diameter (OD). Mark the blank 3″ (7.5cm) above this point (ie towards the tip). Cut there, using a metal saw or a dremel, or maybe more refined techniques if you feel fancy. It’s better to put masking tape where you will cut, to avoid splints. Sand smooth the cut’s edges. The butt part of blank #1 is your extension.
  4. Test fit the extension into blank #2’s butt. The whole extended blank should measure approximately 5’10 (178cm). Mark on the extension where it goes out of blank #2. You will build the handle on the extension, and you don’t want it to go past the point where it enters into blank #2.
  5. Tape the ferrule (ie blank #2’s last inch) and put the whole extended blank under load. Observe the curve, and ask yourself where you want to put the spigot. It will create a hard spot, so you want to get it as low on the butt as you can, without sacrificing too much of the rod’s portability. I found that a 33″ butt, including the spigot, is a reasonable balance.

    Slight but noticeable hard spot

    Slight but noticeable hard spot

  6. Measure 40″ (101,6cm) from the tip on blank #2. Tape the blank, cut and smooth the edge on both parts.
  7. Measure the ID of blank #2’s tip. Find the point on blank #1 with a matching OD. Mark the blank 3″ (7.5cm) above this point. Cut there, and sand the edge. The part below the cut will be the spigot.
  8. Test fit the spigot into the tip of blank #2. Mark the point where the spigot goes out of the tip (call it A). Mark a point one inch below this point (call it B). This is where the spigot should go out of the blank’s butt. Mark a point 3″ below this point. Cut there, sand the edge. The piece of blank is your spigot. The one inch between A and B will show, and preserve a tight fit as the spigot wears down along the years.

    Mister spigot doing its job

    Mister spigot doing its job

  9. We now strengthen the spigot by double walling it. Insert the remaining tip of blank #1 into the spigot, and trim the excess. Epoxy the slim spigot into the larger one. Let cure for a couple of hours. You can even triple wall it if you’re into that sort of things.
  10. We need to shape the spigot so that it will sit exactly where it should into blank #2’s butt. Insert the spigot in the butt, and check where it comes out. Typically, the B point (from step 8) is not visible. Very slowly and carefully, sand all around the spigot’s lower part. Check often to see whether the B point is now visible. When B appears, stop sanding and epoxy the spigot into blank #2’s butt. Let cure.

    spigot1

    You can see there the marks on the spigot: emerging points from butt and from tip

  11. Meanwhile, you can epoxy your grip onto the extension. You may want to stop the grip right where the extension enters the blank. Or — as I did — you may want to let this point visible, to get a kind of ferruled look which I like a lot. This is pure cosmetics, it’s up to your tastes.grip5
  12. Once the grip is cured, epoxy the extension into blank #2’s butt. Make sure the reel seat is where you want it to be with respect to the butt’s spine. Let cure.
  13. You’re ready to wrap that thing and finish it.

Next time, the vented grip, guides specification and Common Cents.